Geofence
In later evaluations, it would be nice if frequently visited destinations like your own home or workplace did not appear with the standard entry location/street/house number but with an individual name. For this purpose, personal entries can be managed in the menu under "Extras"-"Geofence". Important: New entries are created via the Grafana dashboard "Trips" described later. In this dialog, existing entries are managed because, in addition to the name of a location, some other things can also be configured, as described below. When the function is called, a list of currently known entries and a map appears, which contains the positions of personal entries with green pins and entries managed by the project (such as Superchargers, Service Centers, etc.) with blue pins:
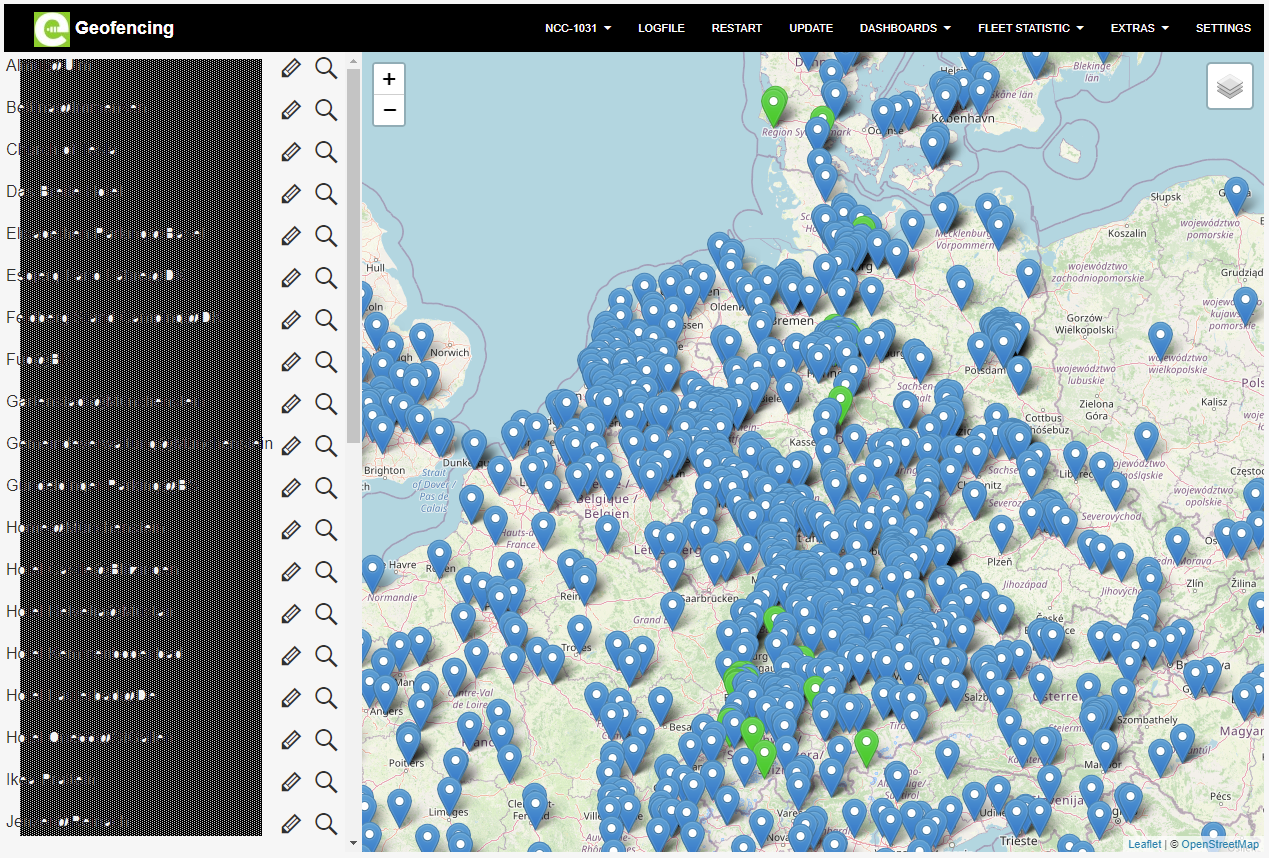
A click on the magnifying glass icon zooms the map to the respective address, a click on the pencil icon starts the edit dialog for the entry:
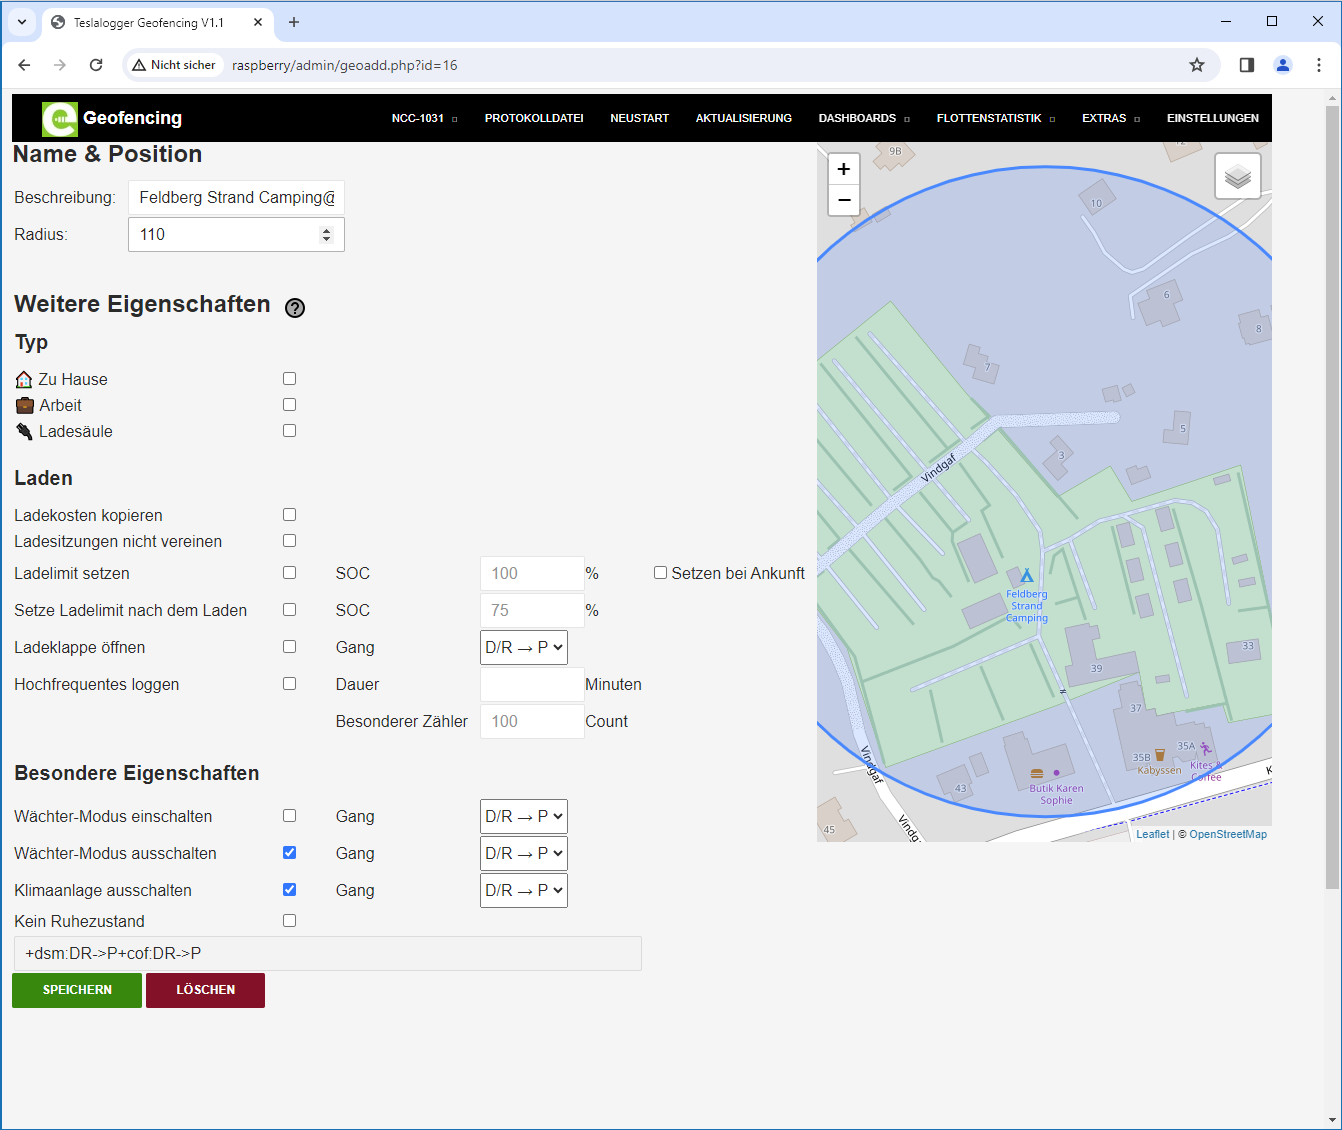
- Label. This is the name of the entry.
- Radius. This is the radius within which the location of the vehicle is recognized as belonging to this entry. If the value is too small, inaccuracies of the GPS may lead to the location not being assigned to the entry. The size is indicated by the blue circle. In the example, the radius is very large because the entire campsite is to be covered.
- Selecting a "Type" creates a symbol in the lists and currently has no further function.
- "Copy charging costs" is selected when a once entered cost structure for a charge at this location should be taken over for all subsequent charges at the same location.
- If several charges at this point without moving the vehicle should be treated as one charge, the checkmark should be set here. This is primarily recommended at home when the photovoltaic system enables surplus charging.
- "Set charging limit" sets the corresponding value when starting charging at this location. This will replace a previously manually entered value via app or in the vehicle. If a value is entered here, it must be changed via app or in the vehicle after starting the charge. Setting the checkmark at "Set on arrival" sets this value not at the start of the charging process, but upon arrival.
- "Set charging limit after charging" can be activated if only a special limit should apply at this location and the usual standard should be reactivated afterwards.
- "Open charge port" opens the charging connector at this location when the gear lever is moved to the selected position. If you always want to charge at this location, this is a convenience.
- "High-frequency logging" serves to activate a higher frequency for the logging process while charging at this location in order to generate precise charging curves.
- "Sentry Mode". Here it can be set whether Sentry Mode should be explicitly activated or deactivated when the gear lever is moved to a selected position.
- "Turn off air conditioning". Turns off the air conditioning at this location.
- "No sleep". Prevents the car from going to sleep at this location. The text field at the bottom contains the (cryptic) character strings that represent the configured parameters in the personal geofence file. Finally, press the "Save" button to save the changes. New entries can be made, among others, via the Grafana dashboard "Trips". You just have to click on an address (when the mouse hovers over the entry, the message "Add Geofence" appears):
