Initial Setup – Flashing the SD Card with the Image
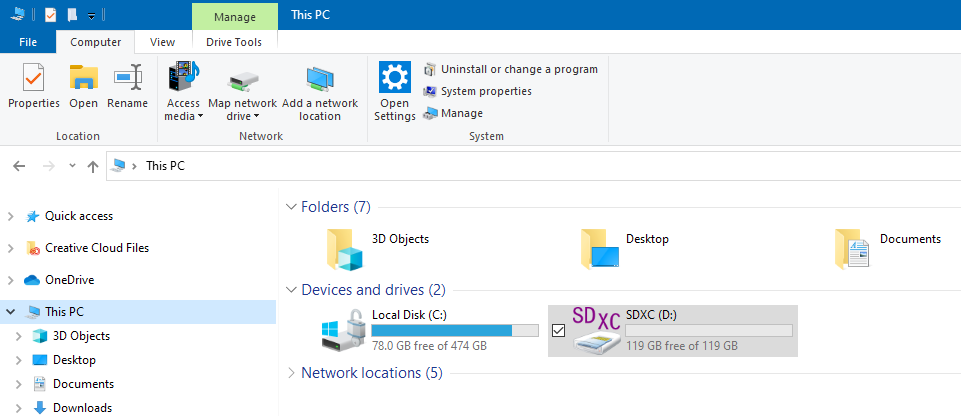
We assume here that no pre-flashed SD card with the TeslaLogger image is available, but that the image is available as a download and an (empty) SD card is present. If a pre-flashed SD card is already available, this chapter can be skipped. Now insert the SD card into the computer and then find out on which drive the SD card is known to the computer. For this purpose, open the Windows File Explorer, select "This PC" and identify the drive letter there. Here: D: (the SD card has 128GB, which is 119GB in the display)
The download comes as a zip file; the .img file contained in it must be unpacked. I recommend placing the .img file on the desktop and deleting it there later, and storing the zip file somewhere safe. Unpacking can take several minutes. Then start Win32 Disk Imager. Download the tool from the specified website beforehand, and save the data somewhere in an empty directory. The tool does not need to be installed; it can simply be started by double-clicking the .exe file where it was saved. The SD card is normally recognized automatically; the drive for it is shown under "Device" and should match what was determined before. Now select the .img file on the desktop and then press "Write".
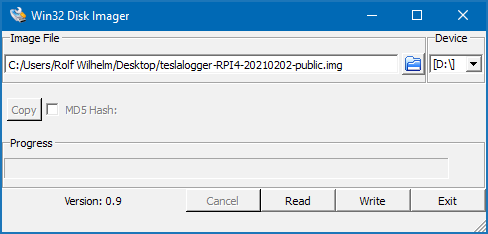
A warning message appears; this must be confirmed with "Yes". The writing process will then be displayed in the bar under "Progress" and will take several more minutes. Caution: Various antivirus programs can prevent this action, as it can be interpreted as a possible attack on the disk (here: the SD card). How to prevent this would go too far here, as it depends on the respective software. If the software is temporarily switched off, please be sure to remember to switch it back on at the end.