TeslaLogger Initial Setup (Without Existing Backup of Another Installation)
This chapter describes the initial setup. Users who want to use an existing backup of an old installation can skip this chapter.
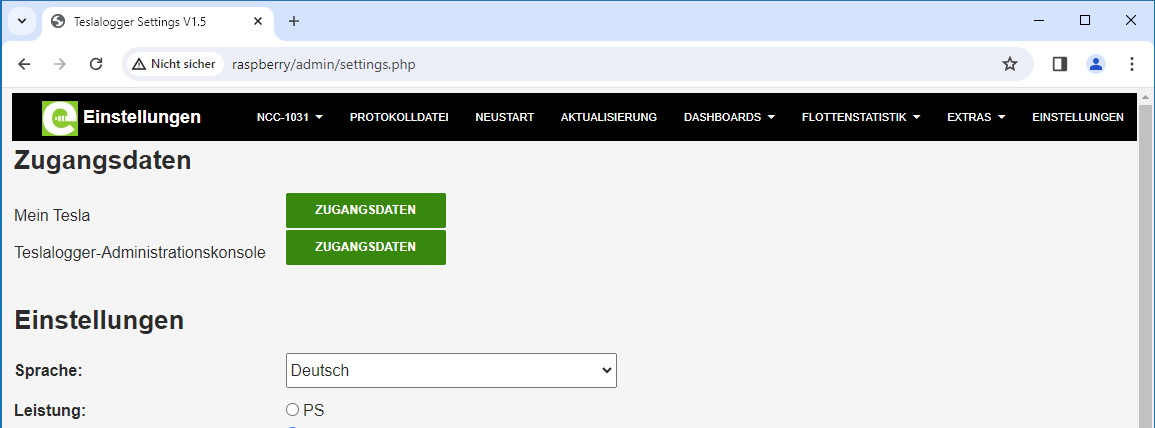
Regardless of whether consent to share anonymous data has been confirmed or not, the menu "Settings" is now called. Here you can select language and some other things; the typical settings are already pre-selected. Cautious users can set "Automatic Updates" to "Stable" here. Anyone who prefers to see kW instead of PS, Fahrenheit instead of degrees Celsius, or miles instead of kilometers: this is the place where that happens. These options are described in detail on page 19, "Settings".
For the next steps, you need the email address of your personal Tesla account, the password, and for those who use multi-factor authentication (MFA), the corresponding code generator. Please press "Credentials":
 In the image that now appears, press "New Vehicle" and the following dialog appears:
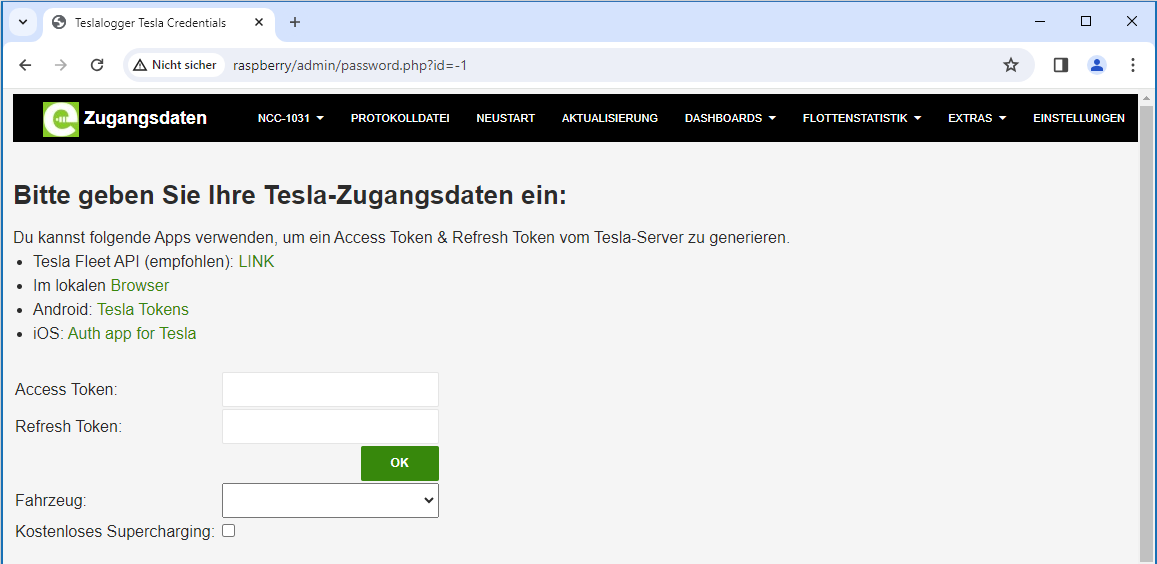 Since February 2024, it is recommended to log in via the new Tesla Fleet API. For this, press the green text "Link" in the image.
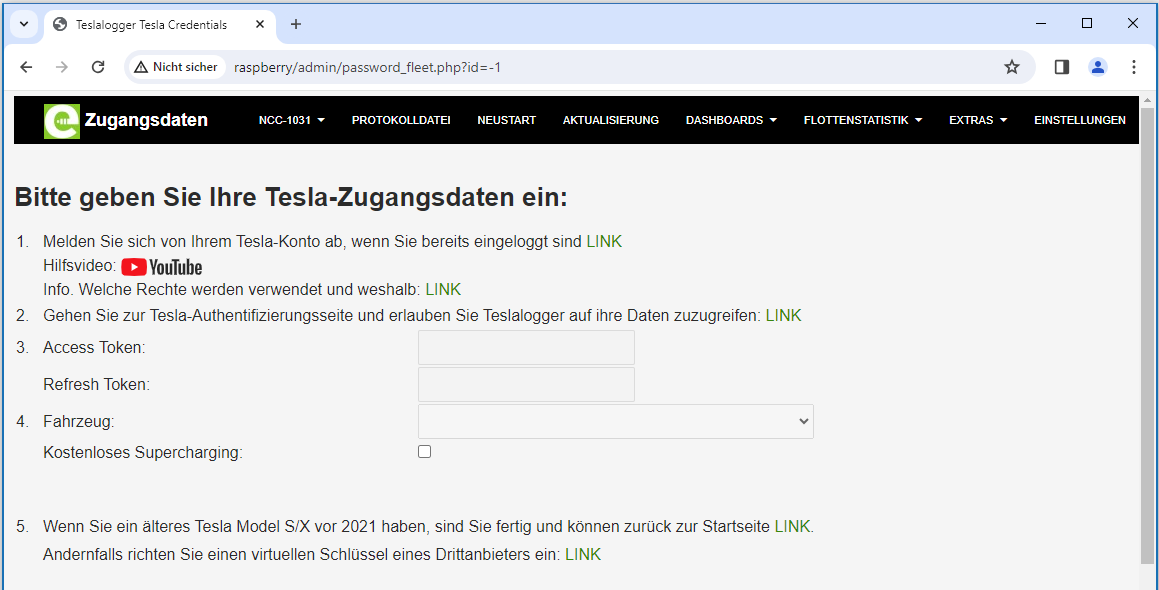 Now follow the instructions, first press "Link" under point 1 and close the tab with the Tesla homepage (or the information that logout was successful). Then select the text "Link" in point 2 and perform the Tesla login. If the following dialog appears in English, you can click on "en-US" at the top right and select your own country and, if necessary, the language.
It then looks like this:
Now follow the instructions, first press "Link" under point 1 and close the tab with the Tesla homepage (or the information that logout was successful). Then select the text "Link" in point 2 and perform the Tesla login. If the following dialog appears in English, you can click on "en-US" at the top right and select your own country and, if necessary, the language.
It then looks like this:
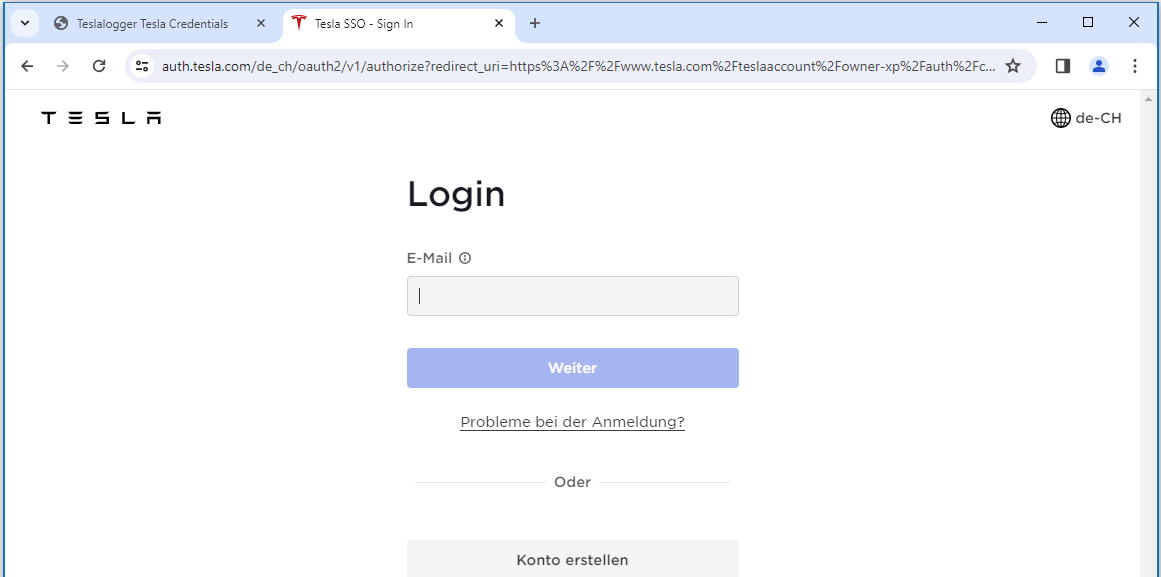 Please enter the email address for the account as requested, press Next, enter the password, press the blue button again, and then enter the code for multi-factor authentication (it is strongly recommended to activate this if not already done).
If the account used is being registered for Fleet API access for the first time, a dialog now appears asking which access options can be enabled for the account. It is recommended to allow everything that has to do with the vehicle. If grants for Tesla energy products such as the Powerwall are offered in the lower half, these are not necessary. At the end, press the blue button.
If everything has run successfully, the credentials dialog appears again, but the data for the access token under point 3 is now filled in. In the list under point 4, now select the vehicle, and those who have free supercharging available for the vehicle should also activate this here.
Please enter the email address for the account as requested, press Next, enter the password, press the blue button again, and then enter the code for multi-factor authentication (it is strongly recommended to activate this if not already done).
If the account used is being registered for Fleet API access for the first time, a dialog now appears asking which access options can be enabled for the account. It is recommended to allow everything that has to do with the vehicle. If grants for Tesla energy products such as the Powerwall are offered in the lower half, these are not necessary. At the end, press the blue button.
If everything has run successfully, the credentials dialog appears again, but the data for the access token under point 3 is now filled in. In the list under point 4, now select the vehicle, and those who have free supercharging available for the vehicle should also activate this here.
 Do not forget to press Save; this completes the configuration.