Automatically Upload TeslaLogger Backups to Google Drive
- Connect to TeslaLogger via SSH
- If not already installed, install rclone:
sudo apt-get install -y rclone - Run
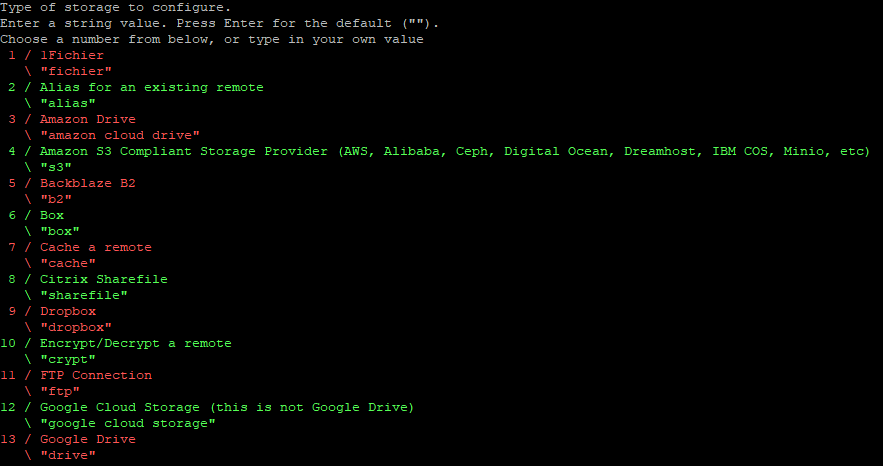
sudo rclone config(sudo is necessary because TeslaLogger also runs as sudo; rclone configuration is user-dependent) - Create a connection (e.g., "tl_backup") and press ENTER

- Find the list number for Google Drive, enter it and press ENTER

- Use this HowTo for client_id and client_secret: https://rclone.org/drive/#making-your-own-client-id
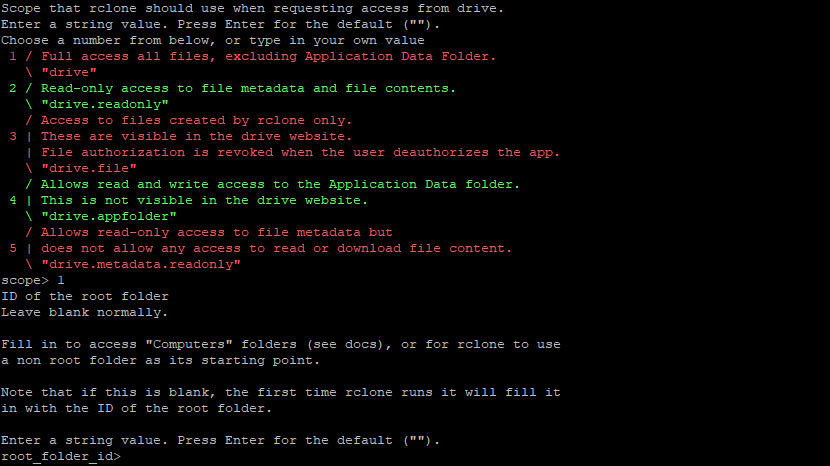
- 1 and ENTER for scope, ENTER for root_folder_id
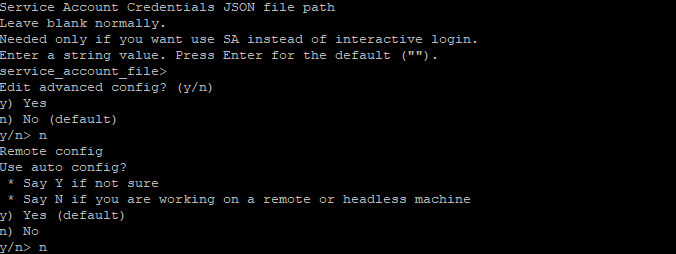
- ENTER for service_account_file, n for Use auto config
- Open the displayed link in the browser. Log in with your Google account and allow access:

- The key is displayed in the browser, copy it with the copy button, paste it into the console, ENTER, and once more ENTER

- The settings file with the token appears, ENTER
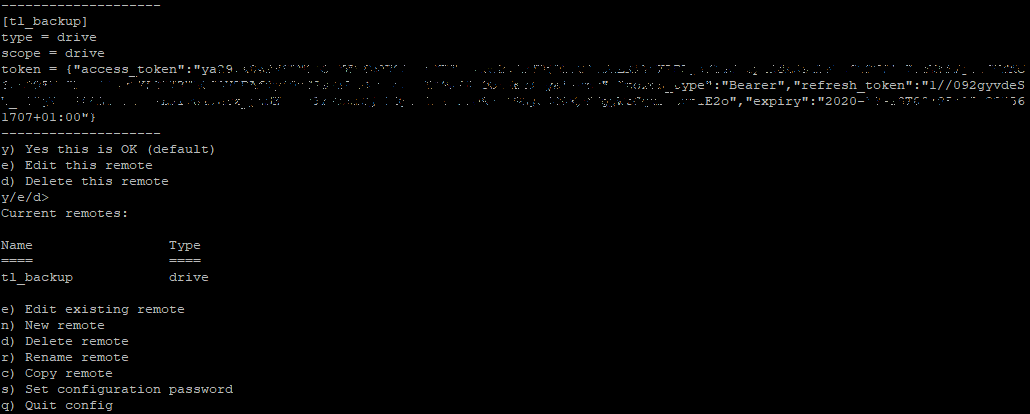
- Then q to quit
- Open nano:
nano /etc/teslalogger/my-backup.shand insert:
#!/bin/bash

/usr/bin/rclone copy --update --verbose --transfers 3 --contimeout 60s --timeout 300s --retries 3 --low-level-retries 10 --stats 1s "/etc/teslalogger/backup" "tl_backup:TeslaLoggerBackup"
With this command, all backup files are copied via the previously created tl_backup connection to the folder "TeslaLoggerBackup". Adjust if needed.
- Save the file: CTRL+X, y, ENTER
- Make executable:
chmod +x /etc/teslalogger/my-backup.sh - Test:
sudo /etc/teslalogger/my-backup.sh - With many backups, the first run takes longer. Success looks like this:

- Open nano again:
nano /etc/teslalogger/my-backup.shand remove --verbose, save (CTRL+X, y, ENTER) - Done. After each new backup, TeslaLogger automatically executes "my-backup.sh".